Password-protecting zip files is a great way of keeping the contents of the zipped package secure. Without password-protecting them, anyone who has access to the file will be able to open it and browse through the contents. This wouldn’t be good if the zipped contents contain confidential information.
By password-protecting your zip files, only those with the password will be able to open them. This will ensure that only authorized users are able to gain access to the data inside.
Password-protecting files are really simple if you’re using third-party software like TitanFile or WinRar.
1. Password-protect a zip file with TitanFile
If you’re looking for an easier, automatic way to password-protect your important files, try TitanFile.
TitanFile is a secure file-sharing and collaboration solution. With TitanFile, uploaded files are automatically encrypted so you won’t have to manually password-protect them before you upload, saving you time and keeping your confidential information secure.
In addition, TitanFile enables you to send files of any size, volume, and type.
To send files through TitanFile, first, sign up for our free trial. Don’t worry, it will only take a few minutes and no credit card is required!
Once you’ve activated your account and logged in, go ahead and create a new channel by clicking the + New Channel button. A channel is a secure workspace where you can send and receive files.
Now, add a recipient by clicking the Add icon. You’ll need to type in the recipient’s name and email address.
Next, attach one or multiple files by clicking the Attach Files button, clicking on your documents, and clicking Open.
Enter a message in the message box if you want to send the recipient a message in addition to the file(s). Click Send when you’re prepared to send your message.
You have officially sent files via TitanFile without having to password-protect them. See how easy that was?
Your recipient(s) will now receive an email notification that will allow them to access the files and reply.
Sign up for a free 15-day trial of TitanFile.
2. How to password-protect a zip file with WinRar
You can password-protect while zipping any file or folder by using compression software such as WinRar. Find the latest copy of WinRar here. The free version is all you need.
Once you have WinRar installed on your computer, follow these simple steps to create a password-protected zip file.
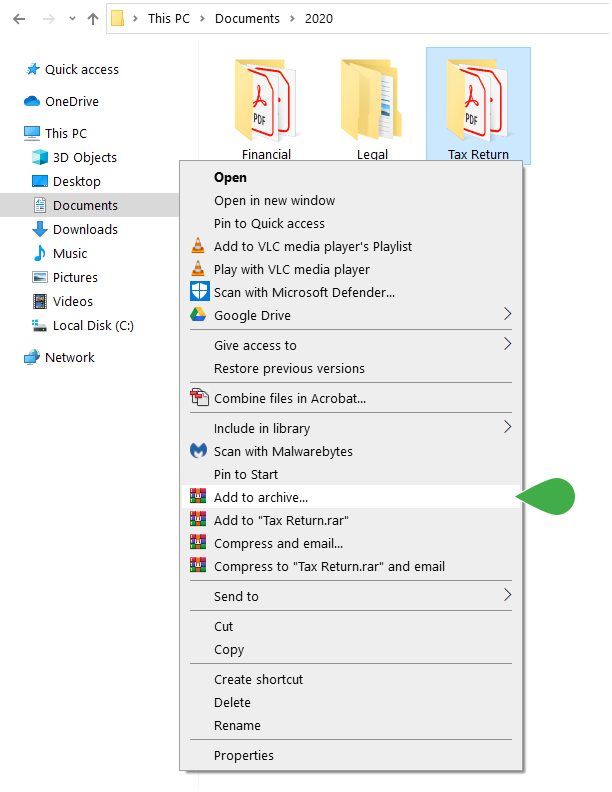
1. Locate the file or folder you wish to zip, then right-click it and select Add to archive.
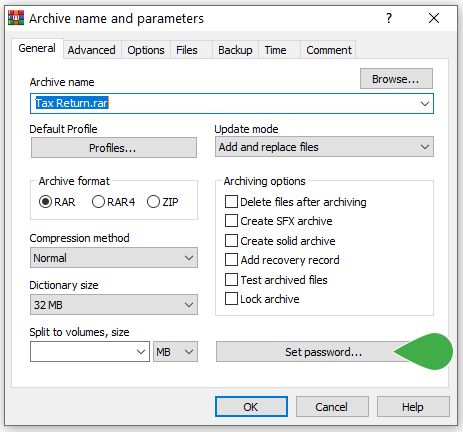
2. Click Set Password.
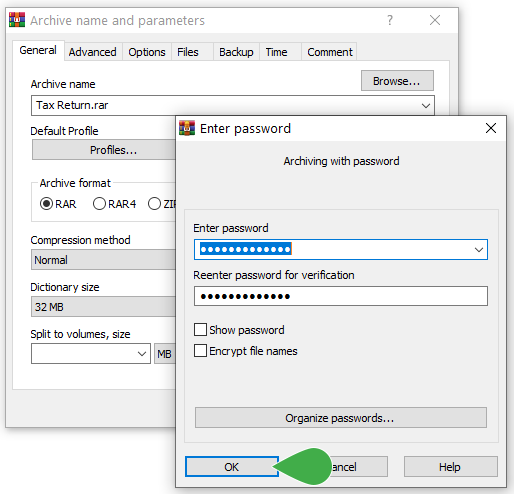
3. Set the password you wish to use. This password will need to be provided to the recipient later. It’s best to use a password that’s at least 12 characters long because it would take centuries for someone to crack. Then, click OK.
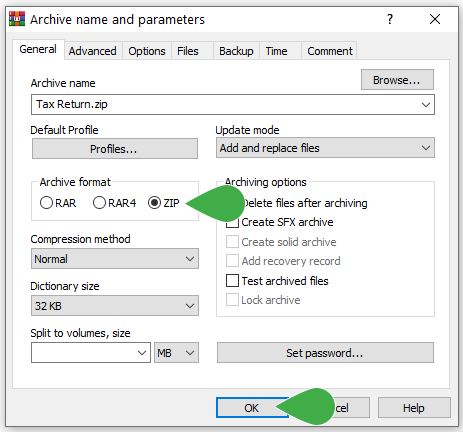
4. Now, select ZIP in the “Archive format” section and then click OK.
5. Once the compression process is complete, you’ll see the zipped file in the same directory.
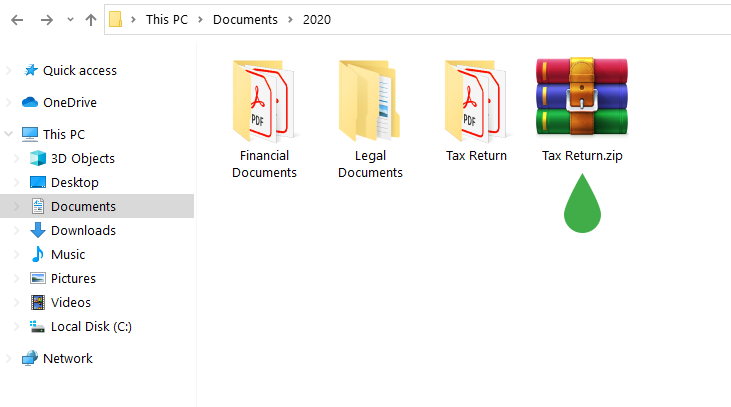
And voila! You just successfully password-protected a zip file.
You can now send this file securely via email, without having to worry about access from unauthorized parties!
